Enchanted Princess Forest Part 1: Building a Fairy-Sized Tree Fort
I almost got busted when I was cutting out the plywood shapes. Lea came out to the garage, saw the plywood cutouts on my workbench and asked what I was doing. I told her I was making cutting boards for a PlanitDIY video. She bought it, but from then on I hid all the parts behind the furnace in the basement.
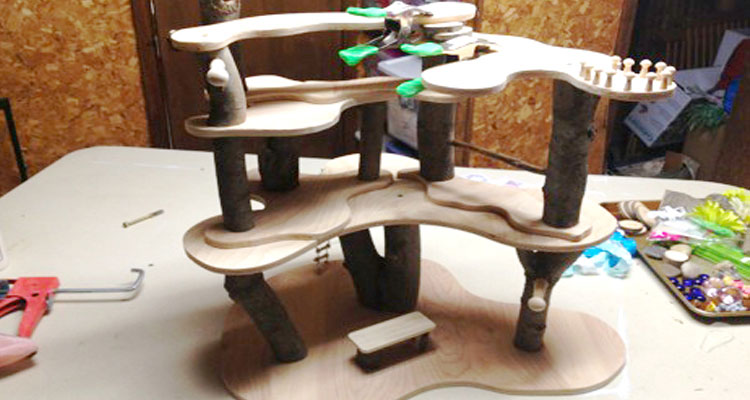
Next, I found an old maple limb in the backyard and started cutting it into manageable pieces. After drying the pieces in the oven for about 30 minutes at 300 degrees, using my miter saw, I carefully cut them into the support pieces for the different levels, using thicker limbs for the lower supports and thinner diameter pieces for the upper supports. The trick here is cutting them so all the support pieces on a given level are the same length, and that the cuts are parallel to each other to keep each “floor” level. This takes some patience, especially when cutting “Y” shaped pieces.
Using screws, construction adhesive and clamps, I assembled all of the sections until it came together.
After the structure was complete, I made some furniture, including a dining table, chairs and a bed. I made the chairs out of slices of maple branch off-cuts, using construction adhesive to join the seats and backs. For the table, I used a scrap piece of ¼” thick poplar for the top, and cut a piece of maple branch in half for the legs. For added strength (and to show off a little bit) I joined the legs with a stick stretcher, boring the holes with a Forstner bit before gluing it all together.
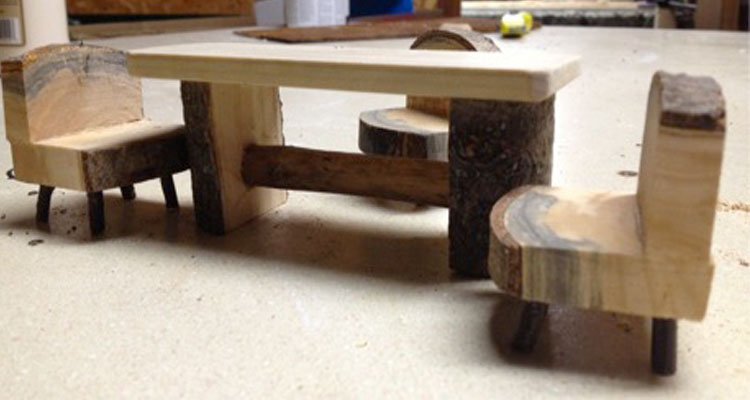
Then I drilled four holes in the bottom of each seat and inserted sticks for chair legs, making sure they were of similar length so the chair would sit true.
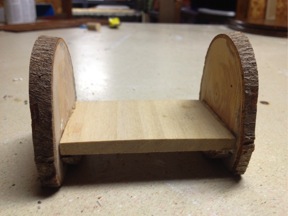
The bed was simply slices of a larger diameter piece of the maple branch as the head and foot, with another scrap piece of 1/4” poplar as the mattress. Squared off slices of maple branch were used as cleats to hold the poplar. If you look closely, you can see them in the photo of the bed.
In my opinion, and the opinions of my three daughters, it couldn’t have turned out any better. Of course, the real work began when my wife took over and brought it to life. And it turned out far better (and a whole lot cheaper) than what we saw in the catalog.
The kicker was that our oldest daughter Ainsley (age 10) did ask for an iPod Touch for Christmas, and she was delighted to receive one. However, when she saw the enchanted forest, she also asked for one, as did our four-year-old daughter Olivia. Looks like I better go cut down another maple limb out back and get busy. We’ll post photos of that one once it’s complete.
Part 2 Coming Soon!
Kindersley Castle Building Centre
304, 12th Ave East (HWY 7), Kindersley SK
306-463-0066